
YOU CAN BUILD YOUR OWN HAY STEAMER – Lizzy Update 8-29-24.
Howdy Friends! Many horses have breathing issues. My Lizzy is one of them. And before her, my wonderful mare Kessy did too. We cured Kessy (READ ABOUT THAT HERE) And now we’ll cure Miss Lizzy, too. Respiratory distress is nothing to take lightly. It will NOT heal itself. But it can be cured.
Soaking hay not good enough.
Mold spores don’t die if soaked, but they do die at temperatures above 130 degrees. Steam of course occurs above 210. I checked the temps in my steamer, inside flakes of hay, it is consistent at 180.
I built my first hay steamer from plans I found on the internet. I’d been soaking my mare Kessy’s hay, and that worked, sort of. But she got worse over time, so I built the steamer. Note here, even on the steamed hay eventually Kessy developed full blown heaves … with management practice adjustments, and help from Dr Thomas’ Chinese Herbs (Read that story HERE) she recovered TOTALLY. I point this out because addressing all aspects is sometimes what it takes. Another note—whether we see it or not, most hay has some mold in it. Of course sometimes we actually see and smell it.
In Miss Lizzy’s case, she came to me with respiratory distress. Just 9 days ago.
I soaked her hay from the start. But as noted soaking is a poor solution, and will only lead to degeneration of health. However it took me a few days to build the hay steamer. And we are also treating Lizzy for Lepto, and a bad case of worms. And had to take three inches off her overgrown feet. Her first week here was packed full of big changes for the one eyed girl. But we have all cylinders firing now, and she is a marvelously cooperative and willing girl. Just flat fun to be around!
So here is a very simple way to build your own steamer for about $100.00.
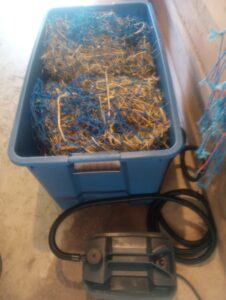
I start with a big storage tote found everywhere. I like the largest I can find. Mine is 36 inches by 20 and 20 inches high.
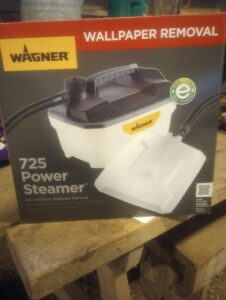
I use Wagner Wallpaper Steamer 125 model, to build my own hay steamer
The steam is produced by a Wagner Wallpaper Steamer 125 model, I bought at Lowes for $69.00. (Interesting note, this is exactly the same price I paid almost 10 years ago for Kessy’s!). I have mine set on a timer to steam just before I feed morning and night for 2 hours, so it’s always fresh and always ready. Note—you must use a heavy duty timer or it’ll burn out the steamer, I learned the hard way.
How to build the steam manifold
My steam manifold is made of 40 inches of 1 inch CPVC pipe (you need to buy 48 inches to make the rectangle you see in the picture). Important to use CPV as regular pvc can’t take the heat (my first manifold I made that mistake and my manifold fell apart quickly). You’ll also need the tee, and end elbows for the pipe, and CPVC nut to attach to pass through adapter you see in the picture. On the CPVC I drilled ¼ inch holes every 4 inches for steam flow.
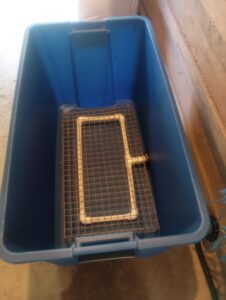
See the manifold and wire net to support hay. Tee goes to connector on side.
Drill a 1 inch hole in the side for the steamer hose to pass through, as pictured, and I used heat tolerant plastic fittings and washers to make the pass-through completely sealed. You can find what you need at any hardware store.
You only need to adapt (with an easy to buy adapter/reducer fitting. The Wagner Wallpaper Steamer 125 model, comes with an 8 foot hose with threaded fittings on each end. So you only need the adapter at the tub to be threaded the same, and you have easy connection. Do not cut the hose.
Finishing touches
Attach the hose from the steamer to the pass through adapter, and you’re ready to steam. Steaming time can vary, should not be less than 45 minutes, I like 2 hours, set on my timer. (Note, it takes about 12 minutes for water to turn to steam in the WAGNER, so that’s 12 minutes NOT steaming)
I also made a netting for over the manifold of one inch galvanized wire to keep hay off the manifold.
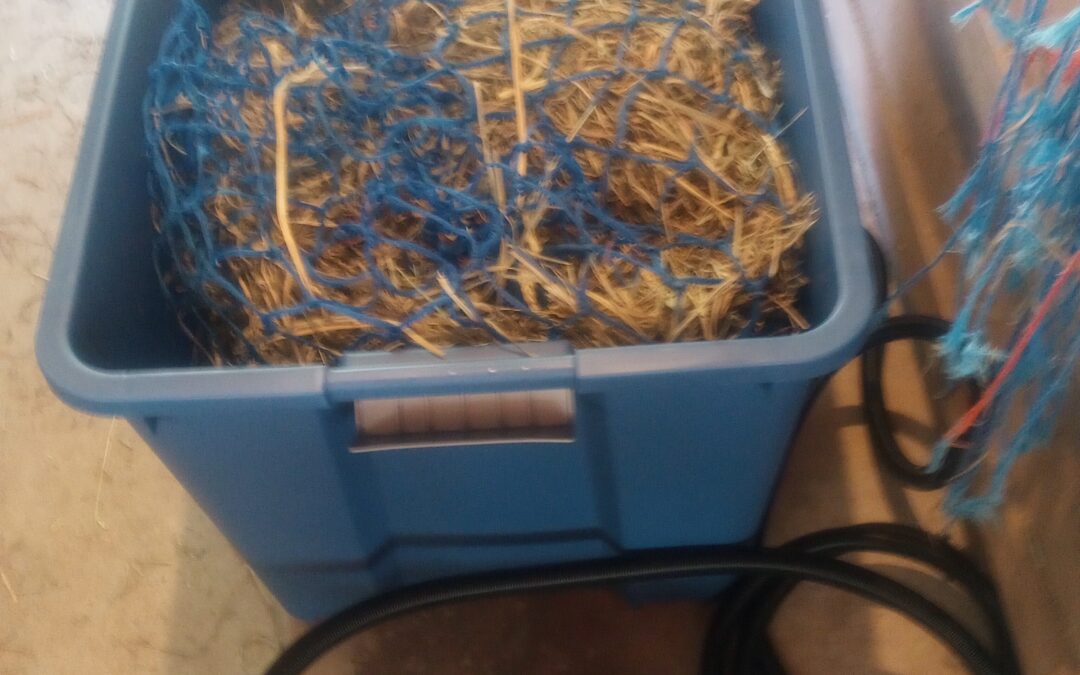
I put 2 meals of 7 pounds dry weight twice a day in hay steamer.
I like to steam in the slow hay feed bags, easier and neater. Miss Lizzy I am feeding 4 times a day. 6 AM – Noon – 7 PM and before I go to bed, 7 pounds dry weight orchard grass hay each meal. I steam 2 meals at a time. Hay when steamed will be fine up to 12 hours. And this way the steamer only needs to run twice a day. When I feed, I always dump the water out of the steamer. There will be a few cups of water in the bottom, and it’s best to dump out each steaming.
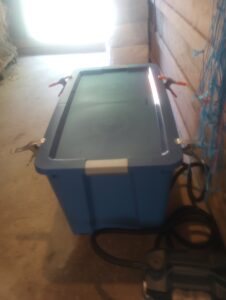
MY HAY STEAMER ALL CLOSED UP AND STEAMING – I like to use clamps on the lid to seal in all that steam
A Few Final Thoughts:
Steaming preserves the minerals, trace elements, and crude protein in hay but does not result in any substantial changes in Water Soluble Carbohydrates and therefore may not benefit horses with metabolic disorders as much as soaking. But soaking can be dangerous.
Steaming hay reduces bacterial counts almost entirely.
This benefits horses with respiratory compromise and also supports a healthier hindgut. A horse’s health depends largely on the health of the intestinal microbiome (a microscopic world of trillions of microorganisms that live in the horse’s digestive tract). Microbial contamination in a horse’s feed can upset the delicate balance of microbes in the hindgut, leading to dysbiosis (an imbalance of microorganisms in the horse) and related conditions such as colic and colitis.
In contrast, soaking hay increases bacterial counts and is considered less hygienic than steaming hay.
As Part of Miss Lizzy’s Recovery:
Lizzy will also be on “FOR LOVE OF THE HORSE” Contemporary Chinese Herbal formulations.. —“Total Immune Health,” (To build white blood cells in bone marrow and rebuild immune system. AND fight Lepto) – “Respiratory Distress,” for breathing & lung ailments. – “Uveitis,” for eye health and repair – twice daily. ….She’s also taking Enrofloxacin for Lepto once daily.
There ya go, an easy to build, easy to use hay steamer. Hope this helps you! ~ Gitty Up, Dutch.


Oh my gosh, loved this article about the homemade steamer. I had a cushing’s horse with respiratory issues and my husband made one similar. She was restricted to 16lbs of low NCS hay per day so I spread that out into multiple 2lb feedings throughout the day and then 6lbs last feeding at night. She was also ulcer prone so needed to avoid long stretches without forage. It does my heart good to know there is someone else out there willing to do what it takes. My friends thought I was nuts. Keep up the good work!
Good for you Carrie! I too am excited to know others are out there who are true stewards and not just owners. God Bless!